DIY Gazebo Roof – How to Install or Replace with Asphalt Shingles (Australia)
This detailed guide will walk you through everything you need to know to complete a successful DIY gazebo roof project.
Whether you’re installing a new roof or replacing an old one, learning how to do a DIY gazebo roof properly can save you thousands.
Ready to master your DIY gazebo roof?
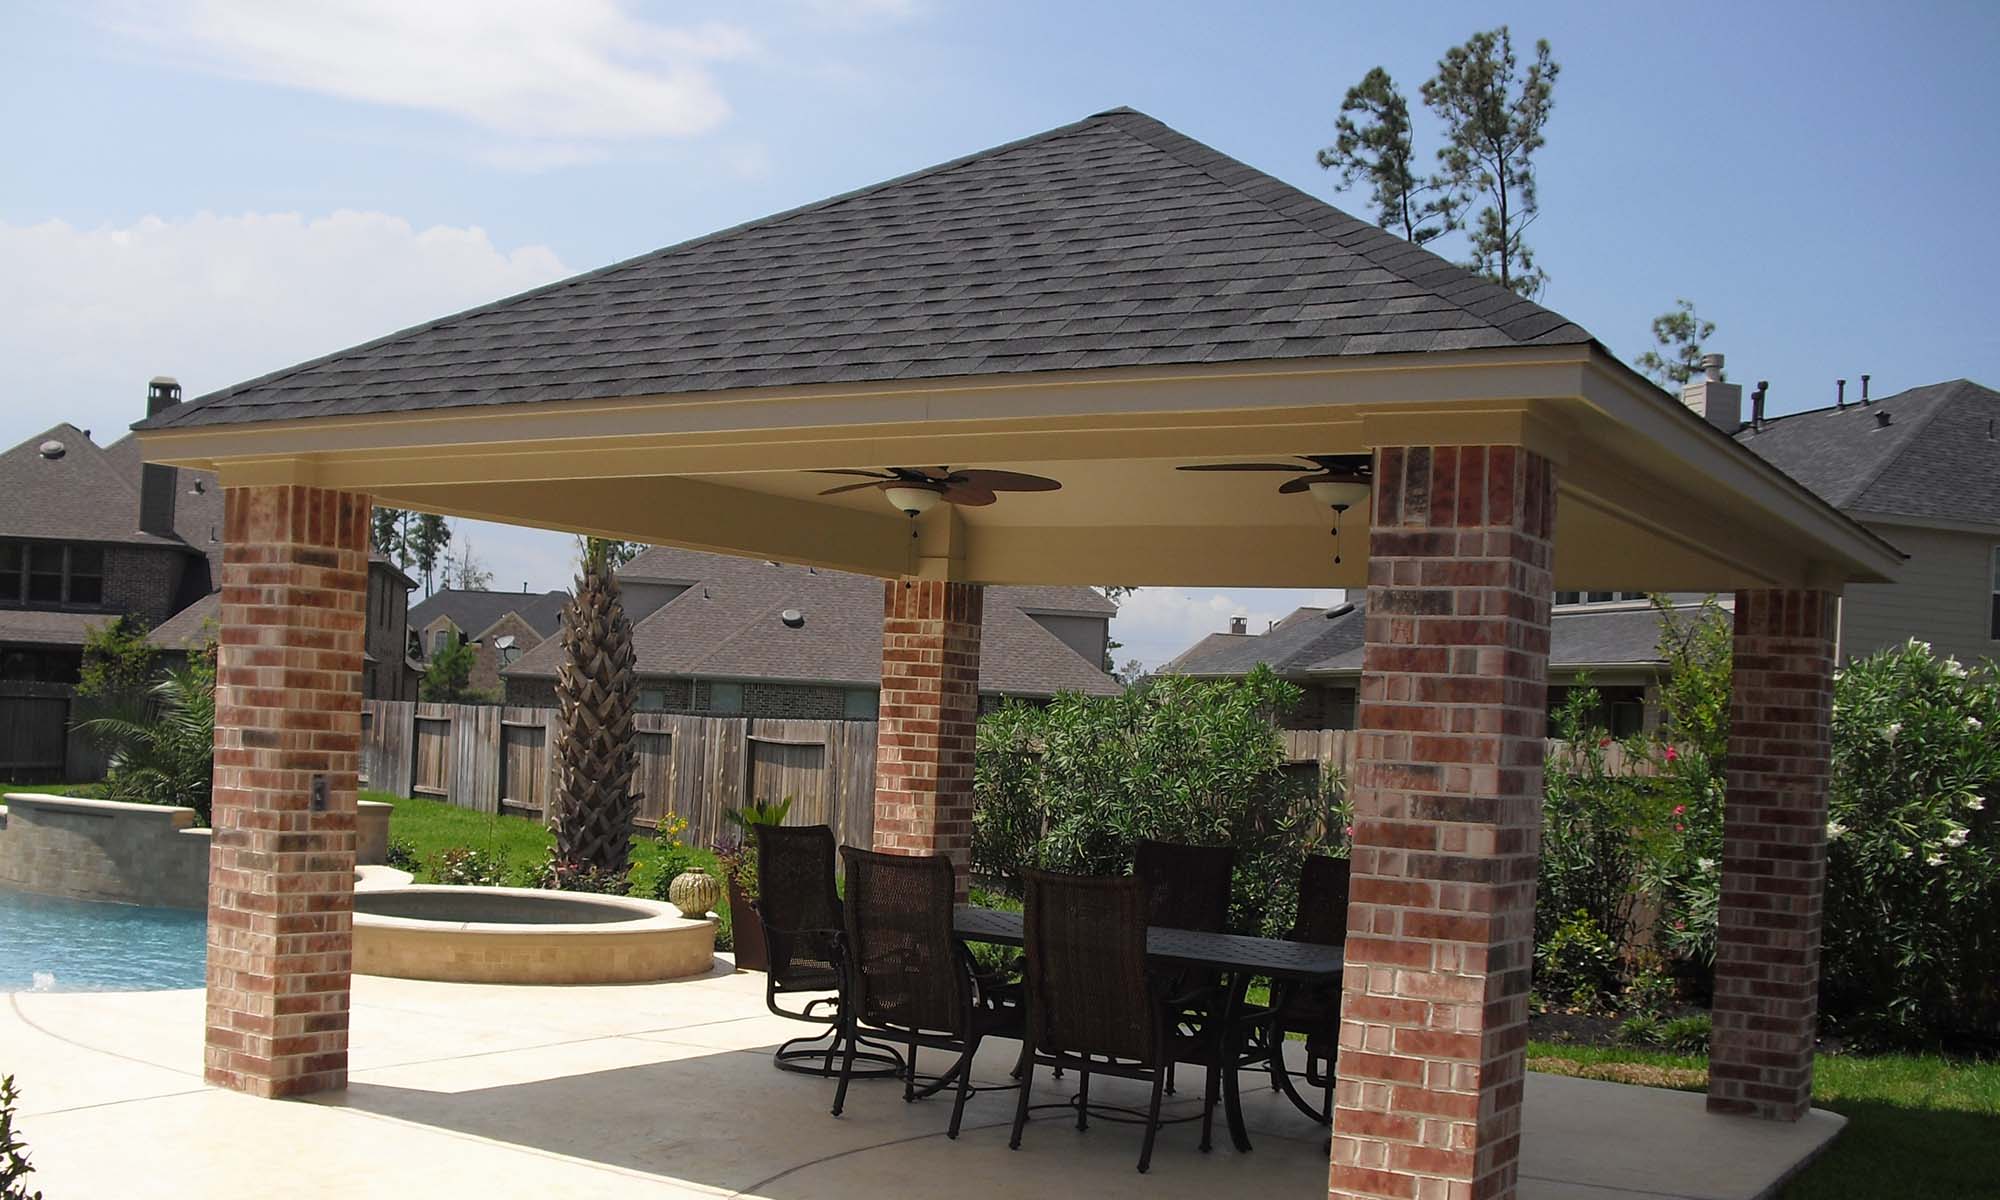
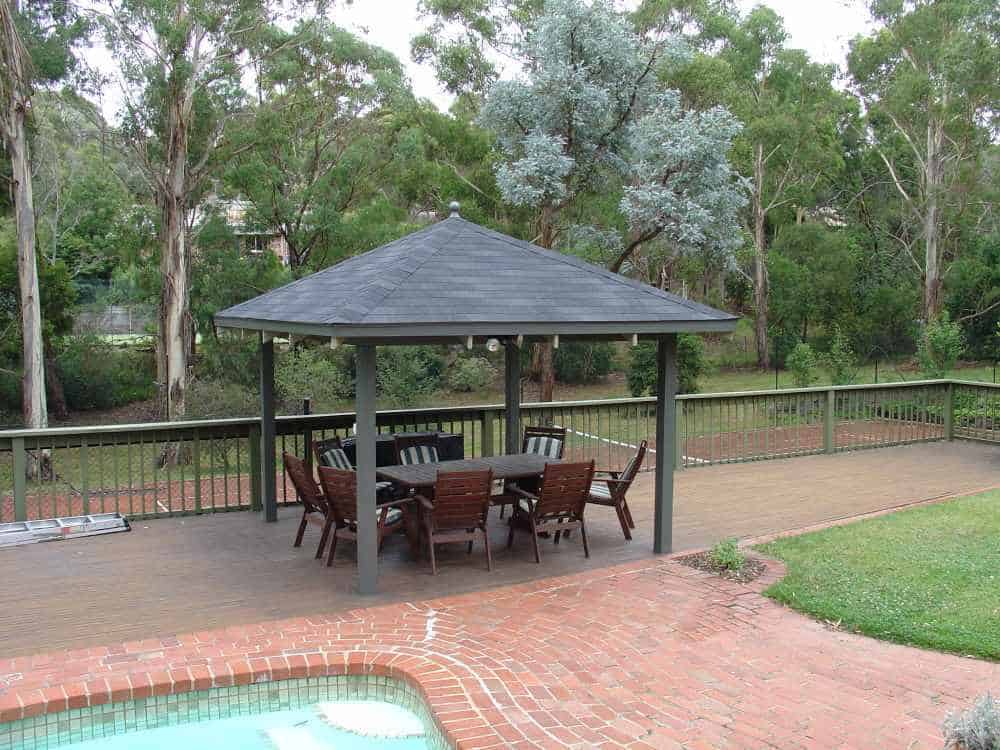
This comprehensive, photo-heavy guide will show you exactly how to install a new DIY gazebo roof or replace an old roof with long-lasting asphalt shingles — a popular and reliable roofing choice for Australian gazebos, pergolas, and patios.
Whether you’re building from scratch or updating an existing frame, you’ll learn professional techniques that deliver a watertight, beautiful, and durable roof that can last 25–40 years in our tough climate.
In this detailed guide you’ll discover:
- The best materials and planning tips for Australian conditions
- Step-by-step installation with real detailed photos
- How to properly handle hips, valleys, flashing, and ridge capping
- Common mistakes that cause leaks and how to avoid them
- Maintenance for maximum lifespan
Thousands of Aussies have already used this system (and our shingle kits) to create stunning backyard structures. Now it’s your turn.
Let’s build you a roof you’ll be proud of for decades.
Jump to a section:
Table of Contents
2. Why Choose Asphalt Shingles for Your Gazebo Roof?
One of the most popular choices for a DIY gazebo roof in Australia is asphalt shingles because of their balance of cost, durability, and ease of installation.
Key Benefits of Asphalt Shingles
- Excellent value for money — Much more affordable than metal or polycarbonate while still looking premium.
- Long lifespan — Quality architectural shingles typically last 25–40 years in Australian conditions.
- Great weather performance — Outstanding wind, hail, and rain resistance when installed correctly.
- Easy to install — The most DIY-friendly roofing material available.
- Wide colour range — Easy to match your house, fence, or existing roof.
- Low maintenance — Mostly self-cleaning in rain.
- Quiet — Much quieter in rain compared to metal roofing.
Asphalt Shingles vs Other Options
| Roofing Type | Cost | Lifespan | DIY Difficulty | Look |
| Asphalt Shingles | Low | 25–40 yrs | Easy | Excellent |
| Metal (Colorbond) | High | 30–50 yrs | Medium | Modern |
| Polycarbonate | Medium | 10–15 yrs | Easy | Modern/Cheap |
| Tiles | Very High | 50+ yrs | Hard | Traditional |
Conclusion: For the vast majority of Australian backyard gazebo and pergola projects, asphalt shingles give the best balance of cost, durability, appearance, and ease of installation.
3. How to Plan Your DIY Gazebo Roof
Proper planning is crucial when undertaking a DIY gazebo roof project. Taking time here will save you money, reduce mistakes, and give you a much better final result.
Key Decisions You Need to Make
1. Roof Pitch
The first step in any DIY gazebo roof is deciding on the best pitch for your structure. We strongly recommend a 25-degree roof pitch for most Australian gazebos.
This angle provides excellent water runoff, strong wind resistance, and a well-proportioned look on almost any-sized structure.
→ Link: Roof Pitch Calculator
2. Shingle Type
- Architectural (Laminated) Shingles → Best choice for most people (thicker, more attractive shadow lines, longer life) Resembles a wooden shake pattern
- 3-tab shingles → Traditional option, Timeless appeal resembling the natural beauty of slate
3. Colour Selection
Choose a colour that complements your house and surroundings. Popular colours in Australia include Dual Black (Slate Grey), Weatherwood, Driftwood and Earthtone Cedar


Shingle Colour Options
Here are some of our most popular colours:
- Dual Black – Available in both 3-Tab and Laminated
- Weatherwood – Laminated only
- Driftwood – Laminated only
- Earthtone Cedar – Laminated only
Note: Stock levels change regularly. Some colours sell out while new ones arrive. Please contact us via phone, email, or text for current availability and samples.
4. Roof Style
- Hip roof (most common and easiest for beginners)
- Gable roof
- Skillion / Mono-pitch (modern look)
- Dutch Gable
- Japanese Variants
Pro Tip: Take photos of your existing roof and house, then order shingle samples before buying the full kit. This avoids colour regret later.
4. Tools & Materials for Your DIY Gazebo Roof
Having the right tools makes a big difference when completing your DIY gazebo roof.
Here’s everything required for a successful DIY gazebo roof project. Quantities shown are for a typical 3.6m x 3.6m gazebo (adjust for your size).
Below is everything you’ll need for a professional-looking DIY gazebo roof.
| Category | Tools Required | Notes / Alternative |
| Measuring & Marking | 8m tape measure, string line, stakes, chalk line, pencil | Laser level (highly recommended) |
| Cutting | Circular saw, mitre saw | Jigsaw for curves |
| Fixing | Cordless drill/driver, hammer, roofing nail gun | Impact driver is very helpful |
| Levelling | 1200mm spirit level, post level | Laser level or water level |
| Roofing | Hook blade knife, tin snips, caulking gun | Roofing hammer |
| Safety & Access | Sturdy ladder or scaffolding, harness & ropes, gloves, safety glasses, dust mask, ear protection | Scaffold is much safer for roofing |
| General | Wheelbarrow, shovel, rubber mallet, square | Post hole digger / auger |
Safety Gear (Mandatory): Work gloves, steel-cap boots, sun protection, dust mask.
Materials – Our Asphalt Shingle Roofing Kit
One custom kit includes:
- Premium asphalt shingles (architectural recommended)
- Self-adhesive underlayment / synthetic felt
- Starter strips & ridge capping
- Valley & step flashing, drip edge (optional)
- Sealant & underlay tape (optional)
- Detailed installation instructions
GAL roofing clout nails are available at your local Bunnings store.
Pro Tip: Prepare all tools and materials before starting. Having everything ready on the day makes the job much smoother and safer.
5. Step-by-Step Installing Your DIY Gazebo Roof
Now let’s get into the practical side of doing a DIY gazebo roof.
This is the main part of the guide. Take your time, work safely, and check that everything is level and square at every stage.
5.1 Roof Deck Preparation
- Install 12mm structural plywood sheets starting from the bottom edge.
- Stagger the joints (like bricks) for maximum strength.
- Leave 2–3mm expansion gaps between sheets.
- Fix sheets with screws or nails at 150mm on edges and 300mm in the field.
- Sand any high spots so the deck is completely flat and smooth.
Pro Tip: Tongue & groove plywood makes a stronger, smoother deck.
(Insert the plywood installation collage/photos here)


Roof Deck Installation in Progress
Pro Tip: Always stagger your plywood joints like bricks and leave small expansion gaps.
5.2 Installing Drip Edge & Underlayment
- Drip Edge – Install metal drip edge along the eaves with a 30–40mm overhang.
- Underlayment – Roll out self-adhesive underlayment or synthetic felt, overlapping rows by 150mm.
- Install valley flashing (if needed) and step flashing where the roof meets posts or walls.
Pro Tip: Always install drip edge first, then roll the underlayment over the top of it.


Drip Edge & Underlayment Installation
- Top: Installing metal drip edge along the eaves with proper overhang
- Bottom: Rolling out self-adhesive underlayment with 150mm overlaps
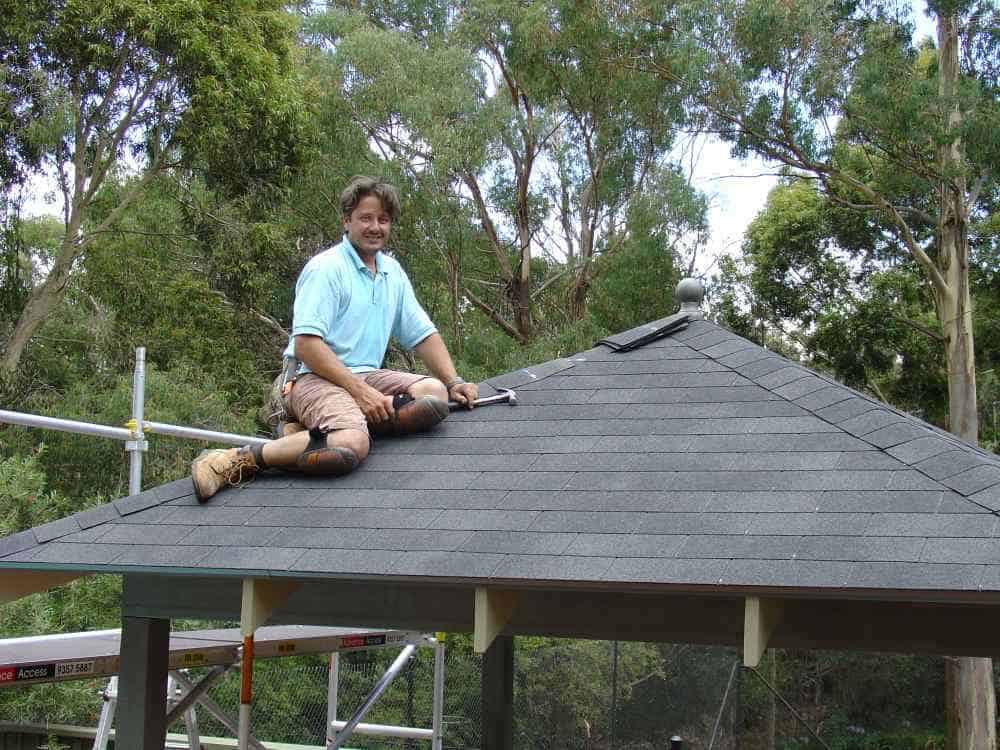
5.3 Installing Asphalt Shingles
- Starter Course – Install starter shingles (upside down) or a dedicated starter strip along the eaves.
- First Row – Lay full shingles, offset by half a tab from the starter course.
- Continue rows with a 140mm (5–6 inch) reveal, staggering joints.
- Cut shingles neatly for hips and valleys.
- Snap chalk lines every few rows to keep everything straight.
Pro Tip: On hot days shingles seal better. On cold days, warm them slightly before installing.


Shingle Installation Process
- Starter course along the eaves
- Snapping chalk lines for straight rows (For vertical alignment and every horizontal course)
- Laying the first few rows of shingles
- Chalking hip lines
- Chalking and cutting shingles at the hip
- Installing hip capping for a clean finish
Pro Tip: Always work from the bottom up and maintain consistent overlaps for best results.
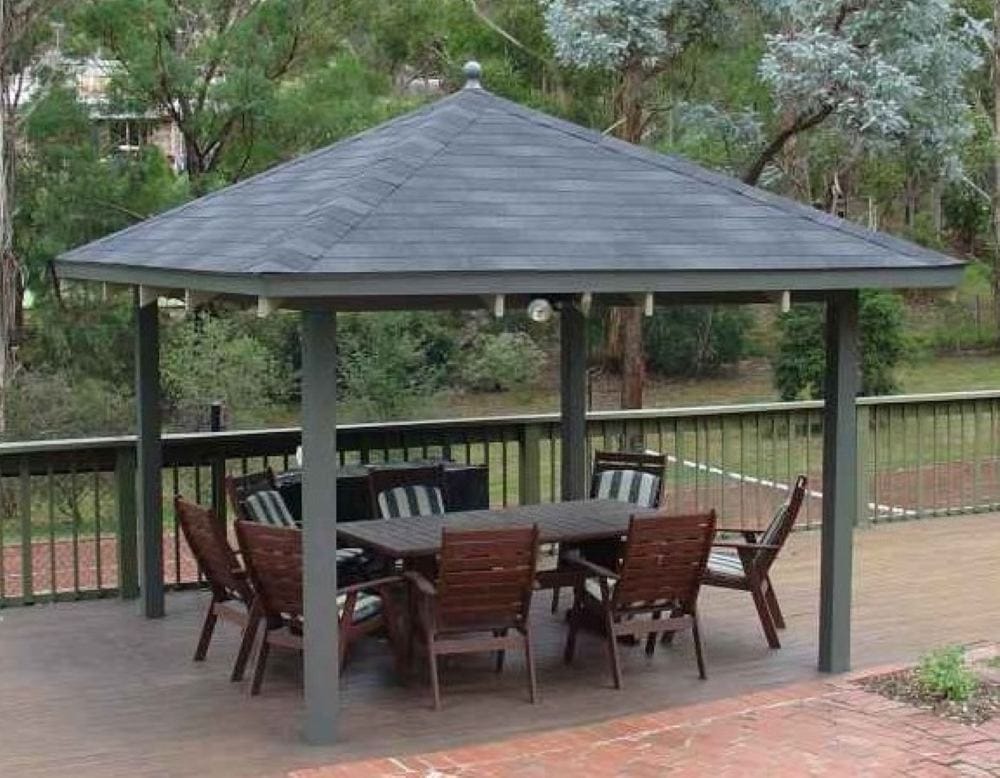
5.4 Hips, (Optional Valleys & Ridge) Finishing Touches
- Install hip shingles carefully, maintaining a consistent reveal.
- Cap the hip with hip capping shingles.
- Seal all exposed nails and edges with roofing sealant (especially important in windy areas).
- Clean up and do a final inspection.
Final Pro Tip: Gently hose the roof with water (after it’s fully dry) to check for any leaks before the first big rain.
The satisfying final moments of your DIY gazebo roof project.
Installing the last pieces of hip capping completes the roof and gives it that clean, professional finish. Well done!
6. Common Mistakes When Doing a DIY Gazebo Roof
Avoid these common pitfalls and you’ll save yourself a lot of time, money, and frustration.
6.1 Most Common Mistakes
| Mistake | Consequence | How to Avoid |
| Uneven rafter tops | Bumpy / wavy roof | Use string line + plane high spots before laying plywood |
| Wrong roof pitch | Poor water runoff or leaks | Stick to 25° (our recommended pitch) |
| Insufficient nailing | Shingles lift in wind | Use 4–6 nails per shingle + extra sealant in windy areas |
| No expansion gaps in plywood | Buckling in summer heat | Leave 2–3mm gaps between sheets |
| Skipping drip edge or underlayment | Early leaks | Always install both |
| Cutting shingles in cold weather | Cracking | Warm shingles slightly or wait for a warmer day |
| Poor site levelling | Twisted frame | Double-check everything with a laser level |
6.2 Pro Tips for a Professional Result
- Work in the right order — Never rush the framing. A straight, level, and square frame makes roofing much easier.
- Chalk lines are your friend — Snap fresh lines every row when laying shingles.
- Hot days are best — Shingles seal better when warm (above 15°C).
- Consistent overhang — Keep 30–40mm overhang on eaves and gables for a clean, professional look.
- Safety first — Use scaffolding instead of just ladders when working above 2m. Wear a harness.
- Paint cut ends immediately — Protect all cut timber from termites and rot.
- Final leak test — After roofing, gently hose the roof to check for leaks before the first big rain.
- Take progress photos — Great for insurance and showing off your finished build!
Bonus Tip: If you get stuck on any step, take a clear photo and send it to us — we’re happy to give you specific advice for your project.
7. Maintenance & Longevity
One of the biggest advantages of a well-installed asphalt shingle roof is how little maintenance it needs while lasting a very long time in Australian conditions.
7.1 Regular Maintenance Schedule
- Every 6 months: Do a quick visual inspection of the shingles, flashings, ridge capping, and valleys. Look for lifted edges, cracked shingles, or missing granules.
- Annually (best before summer): Clean gutters (if fitted) and gently remove leaves/debris from the roof using a soft broom or leaf blower.
- Every 2–3 years: Check and re-apply exterior timber stain or paint on posts, beams, and fascia.
- After major storms or hail: Inspect the roof for any damage and make repairs promptly.
Pro Tip: Asphalt shingles are largely self-cleaning in the rain. A gentle hose-down once a year (from the ground if possible) is usually enough to keep them looking fresh.
7.2 Expected Lifespan
| Component | Expected Lifespan | Notes |
| Asphalt Shingles | 25 – 40 years | Architectural/laminated last longer |
| Treated Pine Frame | 15 – 30+ years | Depends on proper sealing & maintenance |
| Plywood Roof Deck | 20 – 30 years | Good quality structural plywood |
| Complete Gazebo Roof | 25 – 35 years | With normal care |
Final Note:
A properly built and maintained asphalt shingle roof is one of the most cost-effective and long-lasting options for Australian gazebos and pergolas.
Ready to Build Your DIY Gazebo Roof?
You now have the knowledge and confidence to successfully complete your own DIY gazebo roof.
This comprehensive, photo-rich guide — combined with your own hands-on experience — gives you a clear roadmap to build a beautiful, durable, and professional-looking asphalt shingle roof that will serve your family for decades to come.
Whether you’re installing a brand new roof or replacing an old one, a well-done DIY gazebo roof is one of the most rewarding projects you can tackle in your Australian backyard.
You’ve got this!
Next Steps
- Download our free Gazebo Roof Planning Checklist & Material List
- Measure your roof and decide on size, pitch, and style
- Get your custom asphalt shingle kit quote from us
We supply high-quality asphalt shingle roofing kits Australia-wide and are here to help every step of the way — from planning to final inspection.
Ready to get started?
Thank you for reading our DIY Gazebo Roof Guide.
We can’t wait to see your finished project!
Ready to Start Your DIY Gazebo Roof Project?
Need help choosing materials, getting a custom kit quote, or have any questions?
Phone | Email | Text | WhatsApp — We reply fast!