How to Build a Gazebo: Complete Step-by-Step DIY Guide (Australia)
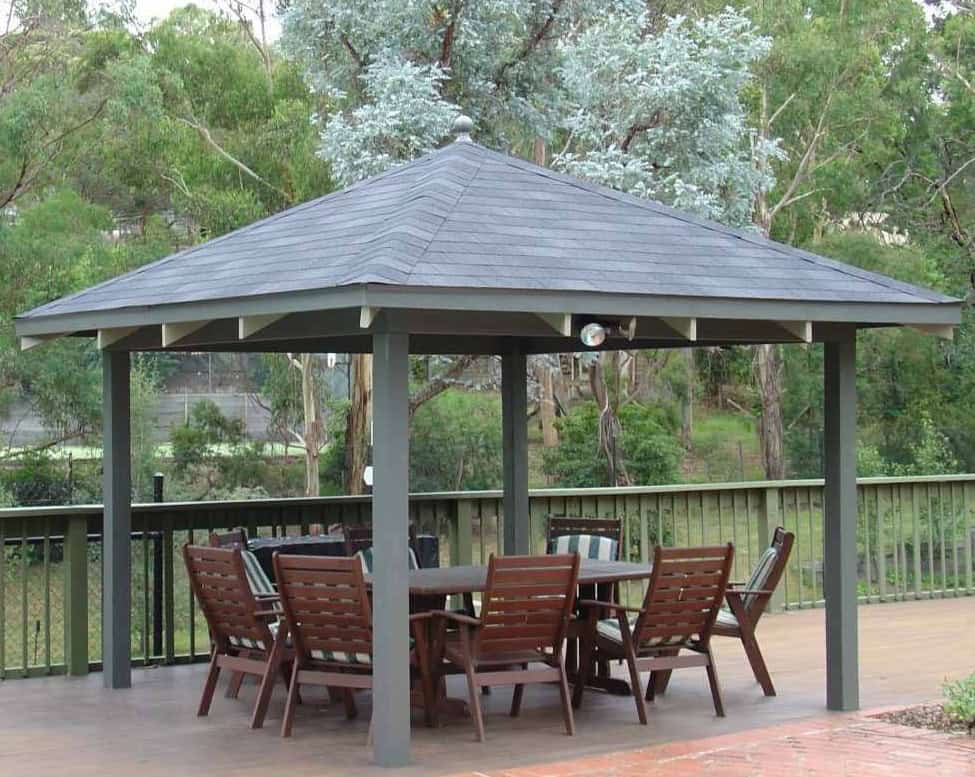
Table of Contents
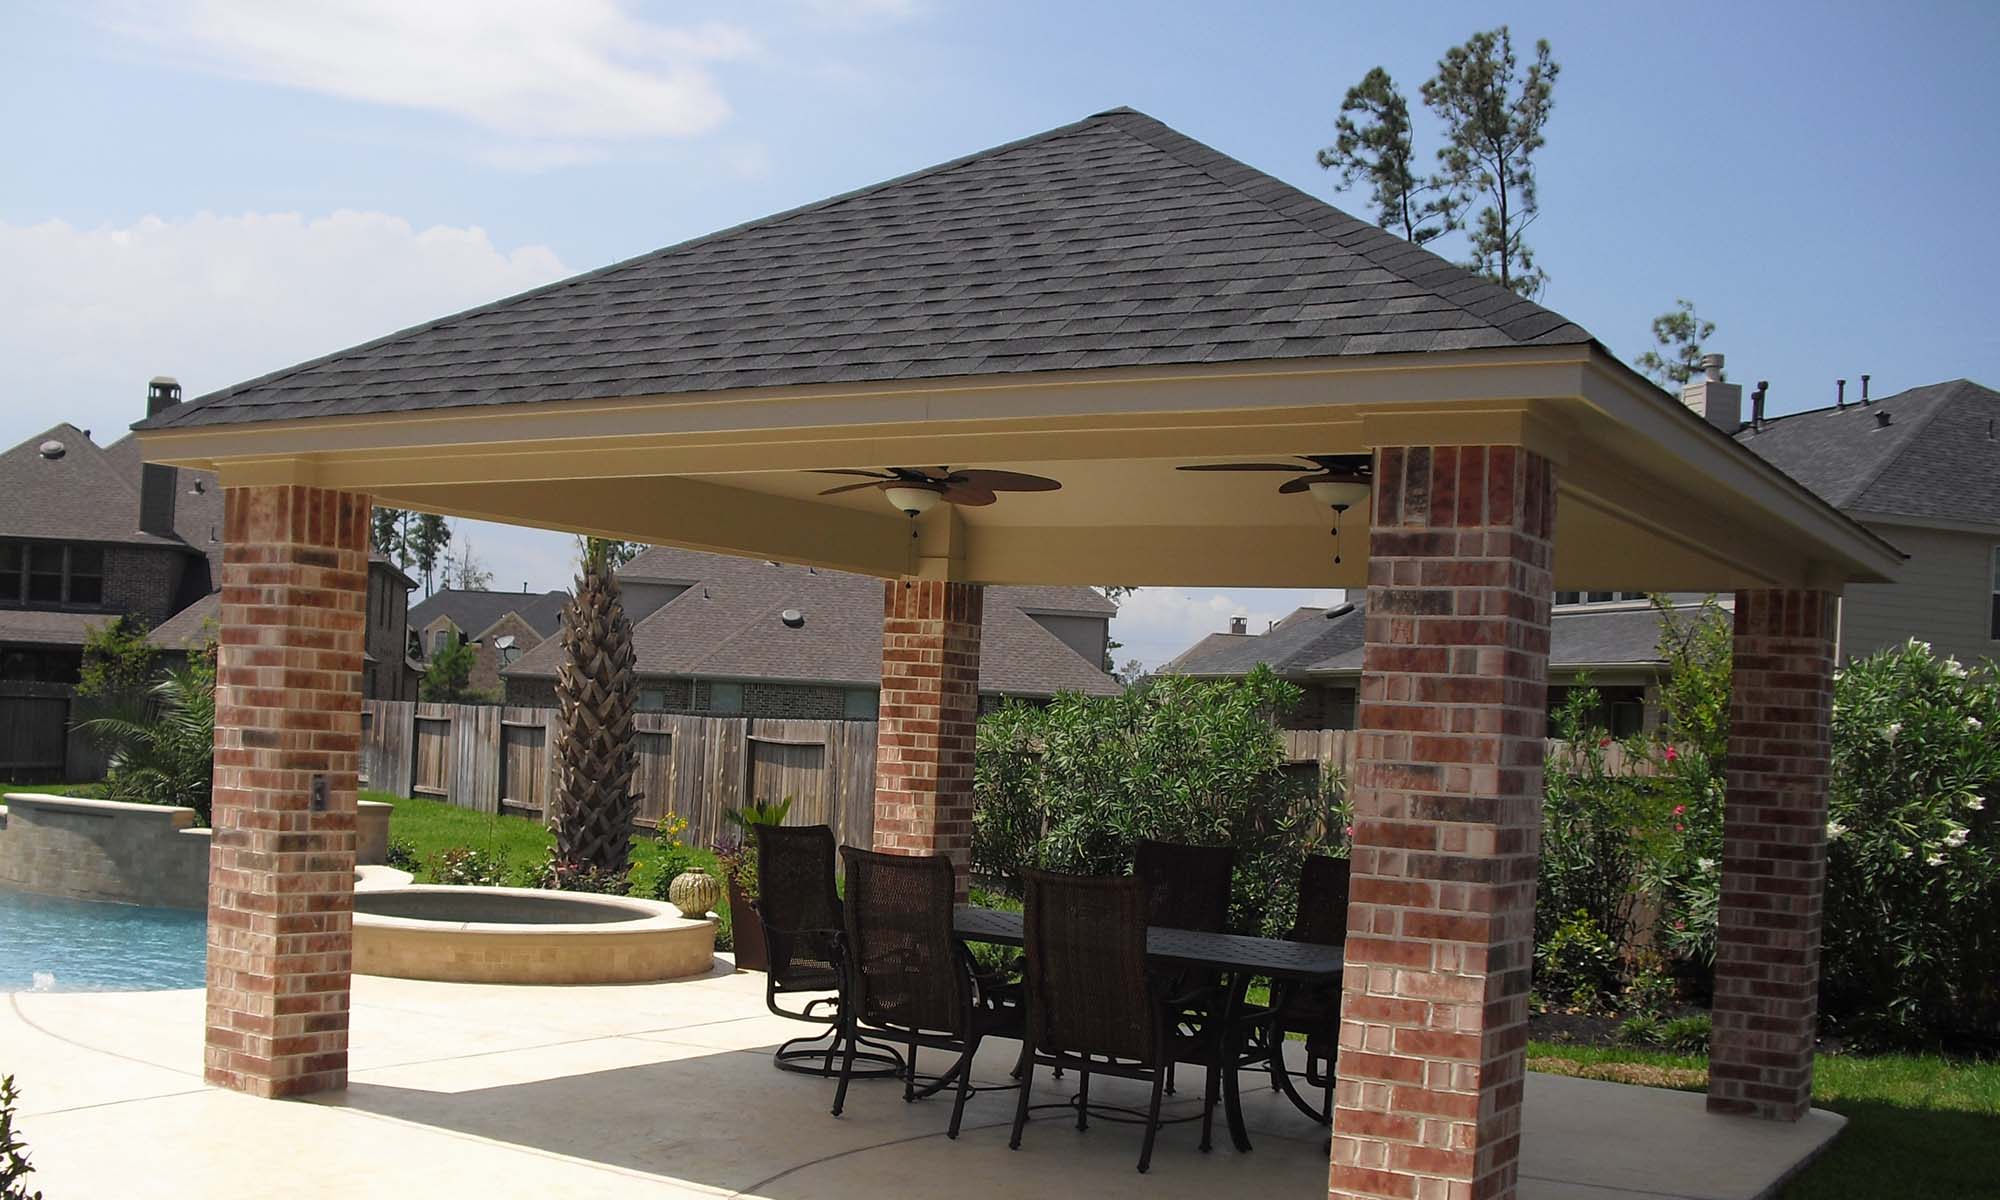
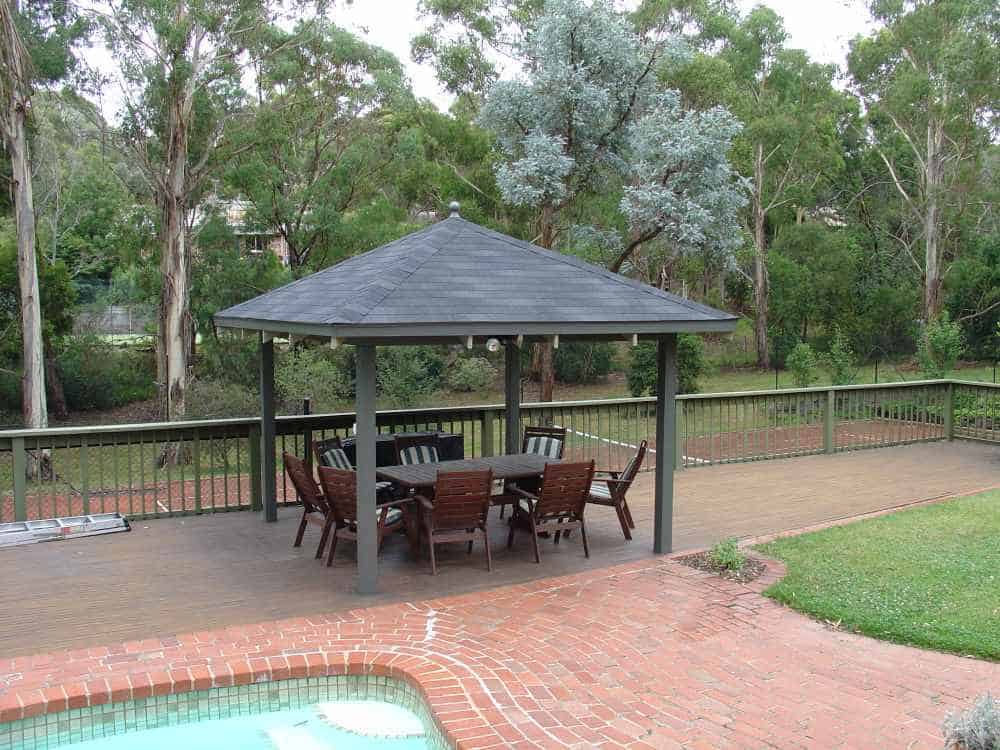
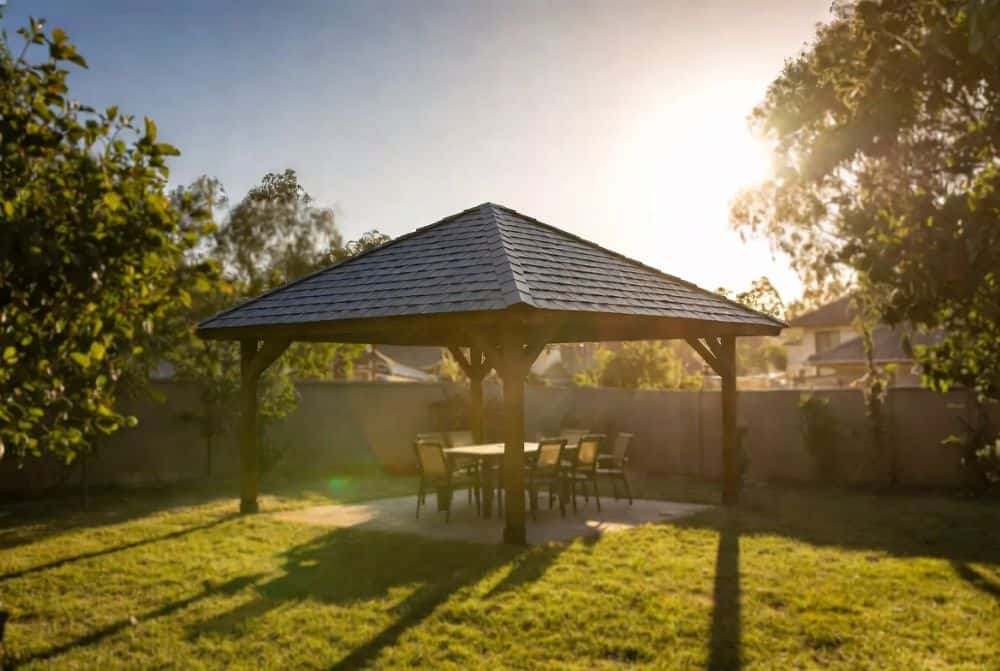
Dreaming of a stunning, permanent backyard gazebo that looks like it belongs in a resort?
This complete step-by-step DIY guide shows you exactly how to build a gazebo from scratch — or roof an existing frame — using readily available Bunnings timber and a professional asphalt shingle roof that will last 25–40 years in Australian conditions.
Whether you want a cosy 3x3m hardtop gazebo retreat or a spacious 4x4m permanent pavilion for entertaining, this guide covers everything: smart planning, site preparation, solid timber framing, plywood decking, and detailed asphalt shingle installation that even experienced DIYers will appreciate.
- ✔ Save thousands compared to hiring a builder
- ✔ Weekend-friendly project (2–4 weekends for most people)
- ✔ Designed specifically for Aussie sun, wind, rain, and termites
- ✔ Clear instructions, shopping lists, diagrams, pro tips & common mistakes
No guesswork. No expensive mistakes. Just a beautiful, durable gazebo you can be proud of.
Ready to build? Let’s learn how to build a Gazebo from start to finish.
1. How to Build a Gazebo – Planning & Design
Building a gazebo starts with good planning. Spend time here and you’ll save money, avoid headaches, and end up with a structure you love for years.
1.1 Choosing the Right Size, Shape & Roof Pitch
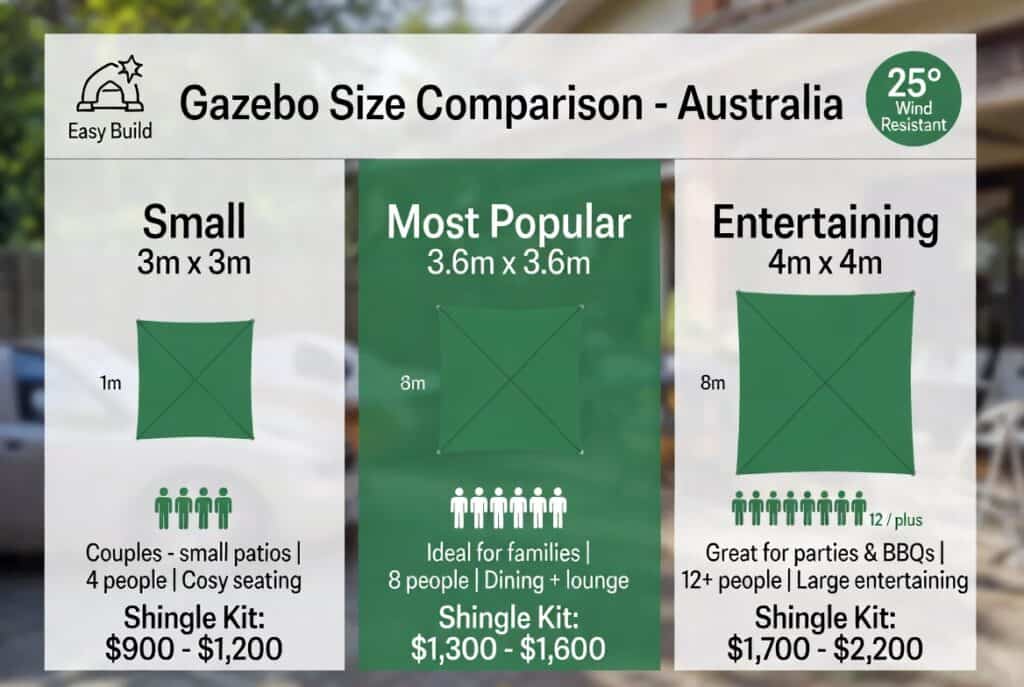
Popular options for Australian backyards:
| Size | Best For | Difficulty | Approx. Shingle Kit Cost* |
| 3m x 3m | Small patios, couples | Beginner | $900 – $1,200 |
| 3.6m x 3.6m | Standard family use | Easy | $1,300 – $1,600 |
| 4m x 4m | Entertaining, dining | Intermediate | $1,700 – $2,200 |
| 3m x 4.5m | Rectangular /poolside | Intermediate | $1,600 – $2,000 |
“Most people who want to know how to build a gazebo choose the 3.6m x 3.6m size…”
*Costs are approximate and include shingles, underlay, flashings & fixings. Plywood bought locally from Bunnings.
Recommended Roof Pitch: 25 degrees
This pitch gives excellent water runoff in heavy rain, good wind resistance, and looks proportional on most gazebos. It also works perfectly with our asphalt shingle kits.
How to Build a Gazebo – Shape Tips:
- Square or rectangular → easiest framing and roofing (recommended for first-time builders).
- Hexagonal or octagonal → more elegant look but requires more accurate hip cuts on shingles.

1.2 Australian Conditions & Council Permits
- Wind rating: 210 km/h (with storm nailing installation).
- Timber treatment: Use H4 or H5 treated pine posts and beams for termite and rot protection.
- Bushfire zones: Check BAL rating requirements in your area.
- Permits: Most councils require approval for structures over 10m² or 2.4m high. Allow 4–8 weeks for approval.
Action step: Contact your local council or use the NSW Planning Portal / Victoria’s VicPlan (or equivalent) early.
Pro Tip: Our shingle kits are engineered for Australian wind loads. We can supply load and fixing information for your engineer if needed.
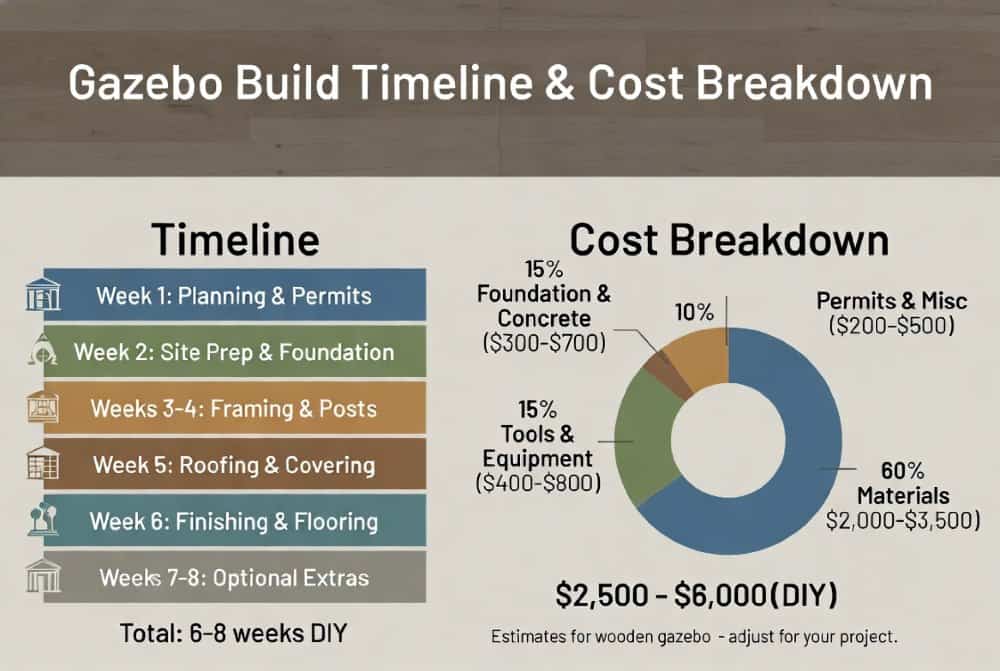
1.3 Budget & Timeline Estimator
Example for a 3.6m x 3.6m Gazebo (2026 prices):
- Bunnings timber, posts, beams, hardware: $900 – $1,300
- Structural plywood deck: $350 – $550
- Our asphalt shingle kit: $1,300 – $1,700
- Concrete, stirrups, paint/stain: $300 – $500
- Total estimated cost: $2,850 – $4,050
Timeline (working weekends):
- Planning & permits: 2–6 weeks
- Site prep & foundation: 1 weekend
- Framing & deck: 1–2 weekends
- Roofing & finishing: 1 weekend
- Total hands-on time: 2–4 weekends
Download: Free Gazebo Planning Checklist & Material Calculator (I can create this PDF later)
2. Site Survey & Preparation
Choosing and preparing the right spot is critical. A well-prepared site prevents future problems with drainage, stability, and levelling.
2.1 Choosing the Best Location
- Level ground is ideal — slight slope is okay if you plan to excavate or build up.
- Sun & shade — consider afternoon summer shade and winter sun.
- Away from large trees (falling branches & roots), power lines, and underground services.
- Drainage — avoid low spots where water pools after rain.
- Access — leave room for materials delivery and safe ladder/scaffolding setup.
- Privacy & views — position for best enjoyment from the house or entertaining area.
Pro Tip: Mark the area with stakes and string for a few days. Sit in the space at different times to test how it feels.


How to Mark Out & Prepare Your Gazebo Site
- Drive stakes and run string lines to mark the exact footprint of your gazebo.
- Check corners are square using the 3-4-5 triangle method and equal diagonal measurements.
- Set posts in position – Once marked correctly, install posts in stirrups with concrete.
2.2 Measuring & Marking the Site (Blocklayer Layout Start)
- Measure your chosen size (e.g. 3600mm x 3600mm).
- Drive stakes at the four corners.
- Run string lines and use a 3-4-5 triangle method (or laser square) to ensure perfect 90° corners.
- Check diagonals are equal = square.
- Mark post locations clearly on the ground (typical spacing 1.8m–2.4m depending on size).

2.3 Soil Check & Footings
- Dig test holes to check soil type (clay, sand, rock).
- For most Australian backyards: Use stirrup posts set in concrete pads or sonotubes.
- Minimum: 300mm x 300mm x 600mm deep concrete footings (deeper in reactive clay or high wind areas).
- Termite protection: Use treated timber + install termite collars or barriers.
Council / Engineering Note: In high wind or bushfire zones you may need engineer-stamped footing details.
2.4 Tools Needed for Site Survey & Preparation
| Tool | Purpose | Essential? |
| Tape measure (8m+) | All measurements | Yes |
| String line & stakes | Marking out | Yes |
| Spirit level or laser level | Checking flat & plumb | Yes |
| Post hole shovel / auger | Digging footings | Yes |
| Rubber mallet | Setting stakes | Yes |
| Spray paint / marking chalk | Ground marking | Yes |
| Wheelbarrow | Moving soil & concrete | Helpful |
Safety Gear: Work gloves, steel-cap boots, sun protection, dust mask.
3. Tools & Materials
Here’s everything you need — separated into Bunnings buys and our asphalt shingle kit. Quantities shown are for a typical 3.6m x 3.6m gazebo (adjust for your size).
3.1 Essential Tools List
| Category | Tool | Notes /Alternative |
| Measuring & Marking | 8m tape measure, string line, stakes, chalk line, pencil | Laser level (highly recommended) |
| Cutting | Circular saw, mitre saw (or handsaw) | Jigsaw for curves |
| Fixing | Cordless drill/driver, hammer, roofing nail gun (or hammer tacker) | Impact driver helpful |
| Levelling | 1200mm spirit level, post level | Laser level or water level |
| Roofing | Hook blade knife, tin snips, caulking gun | Roofing hammer |
| Safety & Access | Sturdy ladder or scaffolding, harness & ropes, safety glasses, gloves, dust mask, ear protection | Scaffold is safer for roofing |
| General | Wheelbarrow, shovel, rubber mallet, square | Post hole digger / auger |
Pro Tip: Rent a roofing nail gun and compressor from Bunnings Tool Hire for the shingle day — it makes the job much faster and neater.

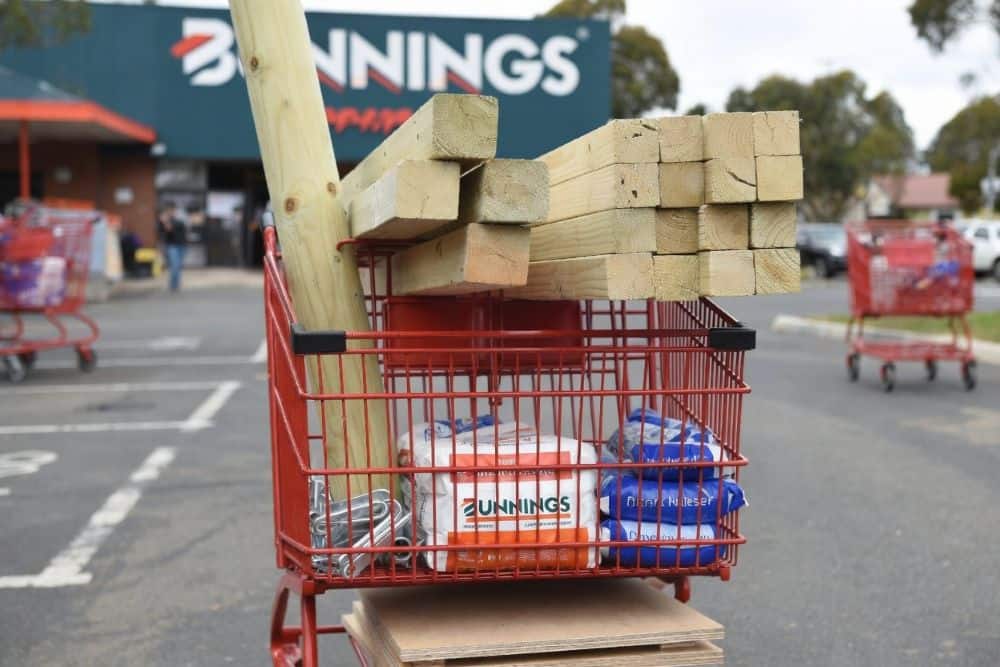
3.2 How to Build as Gazebo with Bunnings Timber & Hardware Shopping List (3.6m x 3.6m example) Treated Pine (H4 or H5 recommended):
- 90x90mm posts × 4 (3.0m long)
- 140x45mm beams / top plates
- 90x45mm rafters (at 600mm centres)
- 90x45mm fascia & barge boards
Roof Deck:
- 12mm Structural CD Grade Plywood (tongue & groove if possible) — approx. 15–18 sheets
Hardware & Fixings:
- Galvanised post stirrups / brackets
- M12 bolts, coach screws, bugle screws
- Galvanised framing nails & screws
- Concrete (bagged or ready-mix) — approx. 8–12 bags
- Termite collars / barriers
Optional Finishing:
- Exterior paint or timber stain
- Guttering (if desired)
3.3 Our Asphalt Shingle Roofing Kit
One custom kit includes everything you need for a professional finish:
- Premium asphalt shingles (3-tab or architectural/laminated)
- Self-adhesive underlayment / synthetic felt
- Starter strips & ridge capping
- Valley flashing, step flashing, drip edge
- Colour-matched roofing nails
- Sealant & underlay tape
- Installation instructions tailored to your gazebo size & pitch
Why our kit?
- Designed for 25° pitch (ideal for Australia)
- Hail & wind resistant
- 25–40 year lifespan
- Beautiful range of colours to match your home


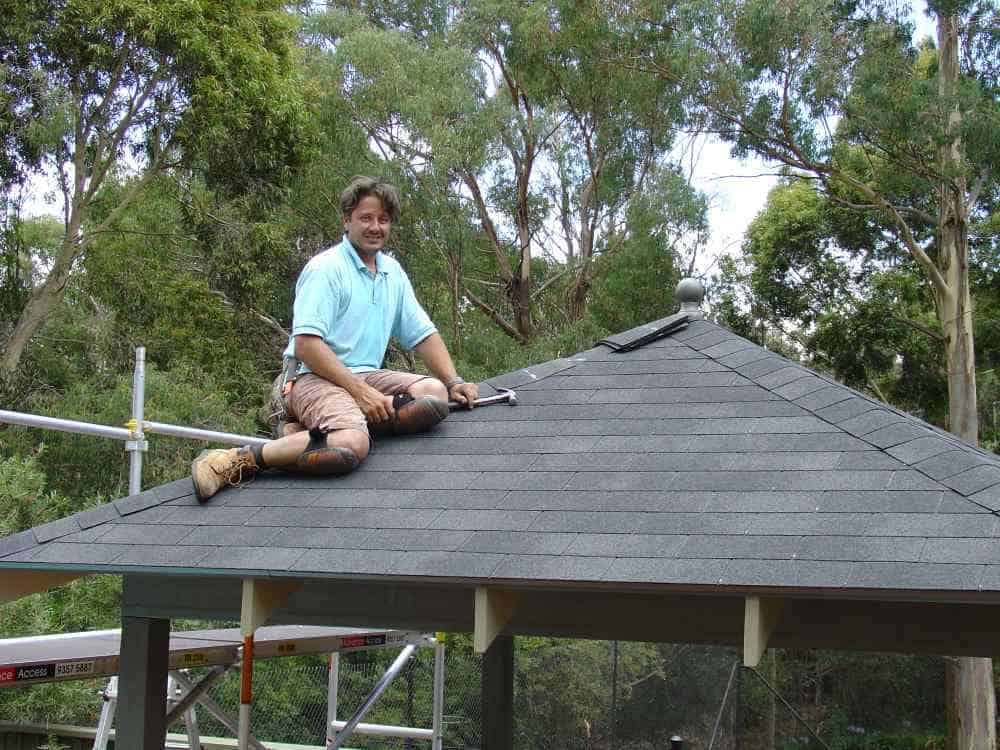
Our Asphalt Shingle Kit in Action
- Starter course + layout – Installing the starter row and snapping chalk lines for straight, professional rows.
- Running the courses – Shingles neatly installed up to the hip with proper overlaps.
- Final touches – Happy customer finishing the ridge capping on the completed roof.
Result: A beautiful, long-lasting asphalt shingle roof you can be proud of!
4. Step-by-Step Construction
Follow these steps in order. Take your time, work safely, and regularly check that everything is level and square.
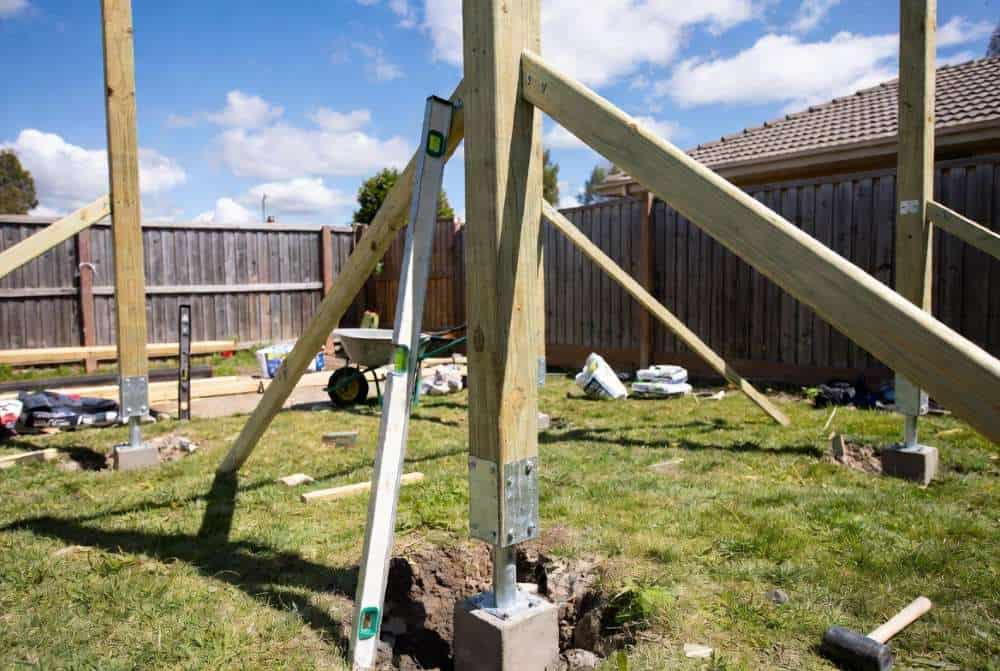
4.1 How to Build a Gazebo – Foundation & Posts
- Dig holes at marked post locations (minimum 600mm deep × 300mm wide).
- Place galvanised stirrups or post anchors in the holes.
- Mix and pour concrete, ensuring posts will sit plumb.
- Set posts in stirrups, brace them, and check plumb in both directions with a level.
- Allow concrete to cure for at least 24–48 hours (longer in cold weather).
Pro Tip: Double-check post heights are equal — this makes the rest of the build much easier.
“Once your foundation is ready, you’re ready for the next stage of how to build a gazebo — the framing.”
4.2 How to Build a Gazebo – Framing & Blocklayer Layout
- Install bottom and top plates/beams.
- Fix rafters at 600mm centres (this spacing works perfectly with plywood and shingles).
- Install hip rafters and ridge beam if building a hip roof.
- Ensure all rafter tops are in the same plane (use a string line or straight edge).
- Add fascia and barge boards.
Blocklayer Tip: Mark rafter positions clearly on the top plates before fixing — this keeps everything evenly spaced.

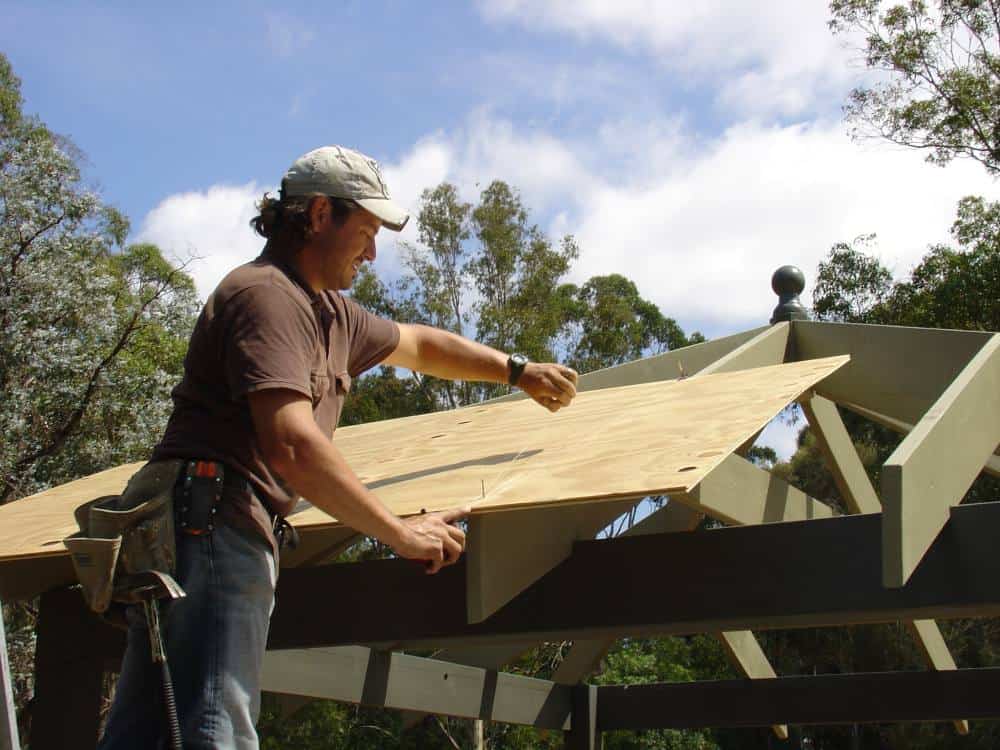
4.3 How to Build a Gazebo – Plywood Roof Deck
- Start at the bottom edge and lay 12mm structural plywood sheets.
- Stagger joints (like bricks) for strength.
- Leave 2–3mm expansion gaps between sheets.
- Fix with appropriate screws/nails at 150mm on edges and 300mm in the field.
- Ensure the deck is completely flat and smooth — sand high spots if needed.
Pro Tip: Tongue & groove plywood makes a stronger, smoother deck.
“After the plywood deck is complete, it’s time to learn how to build a gazebo roof with asphalt shingles.”
4.4 How to Build a Gazebo – Underlayment, Drip Edge & Flashing
- Install metal drip edge along the eaves.
- Roll out self-adhesive underlayment or synthetic felt, overlapping by 150mm.
- Install valley flashing (if you have valleys) and step flashing where the roof meets any walls.
- Add ice & water shield in valleys or low-pitch areas.


- Drip Edge – Install metal drip edge along the eaves with a 30–40mm overhang for proper water shedding.
- Underlayment – Roll out self-adhesive underlayment or synthetic felt, overlapping rows by 150mm.
Pro Tip: Always install the drip edge first, then the underlayment over it.
4.5 How to Build a Gazebo – Installing Asphalt Shingles
- Install starter course (shingles upside down or use starter strip) along the eaves with a 30–40mm overhang.
- Lay first row of shingles, offset by half a tab.
- Continue rows with 5–6 inch (approx 140mm) reveal, staggering joints.
- Cut shingles neatly for hips and valleys.
- Cap the ridge with ridge shingles or roll ridge.
- Seal all exposed nails and edges with roofing sealant (especially important in windy areas).
Detailed Shingle Tips:
- Use 4–6 nails per shingle.
- Work from the bottom up.
- Snap chalk lines every few rows to keep everything straight.
- On hot days, shingles seal better — on cold days, warm them slightly.
4.6 Finishing Touches
- Install fascia covering and soffits (optional but neat).
- Add ceiling lining (pine tongue & groove looks great).
- Paint or stain all timber.
- Clean up site and do final checks.
5. How to Build a Gazebo – Common Mistakes & Pro Tips
Avoid these pitfalls and you’ll save time, money, and frustration.
5.1 Most Common Mistakes
| Mistake | Consequence | How to Avoid |
| Uneven rafter tops | Bumpy roof, shingles look wavy | Use a string line + plane high spots before decking |
| Wrong roof pitch | Poor water runoff or leaks | Stick to 25° (our recommended pitch) |
| Insufficient fixing / nailing | Shingles lift in wind | Use 4–6 nails per shingle + extra sealant in coastal areas |
| No expansion gaps in plywood | Buckling in heat | Leave 2–3mm between sheets |
| Poor site levelling | Twisted frame | Check and re-check with laser level |
| Skipping underlayment or drip edge | Early leaks | Always install both |
| Cutting shingles in cold weather | Cracking | Warm shingles slightly or wait for a warmer day |
5.2 Pro Tips for a Professional Result
- Work in the right order — never rush the framing. A straight, level frame makes roofing easy.
- Chalk lines are your friend — snap lines every 3–4 rows when laying shingles to keep them perfectly straight.
- Hot days are best for shingles — they seal better when warm (above 15°C).
- Overhang — keep a consistent 30–40mm overhang on eaves and gables for a clean look and better water shedding.
- Safety first — use scaffolding instead of just ladders for the roof work. Wear a harness when working above 2m.
- Termite & rot protection — paint or stain cut ends of timber immediately.
- Final check — after roofing, hose the roof gently with water to test for leaks before the first big rain.
- Take progress photos — great for insurance and for showing off your build!
Image placeholder: Before/after or “Common gazebo roofing mistakes vs correct install”
Bonus Tip: If you get stuck on any step, take a clear photo and send it to us — we’re happy to give specific advice for your project.
6. Maintenance & Longevity
Your asphalt shingle gazebo roof is designed to need very little maintenance while lasting 25–40 years in Australian conditions.
6.1 How to Build a Gazebo – Regular Maintenance Schedule
- Every 6 months: Visual inspection of shingles, flashings, and ridge capping. Look for lifted edges, cracked shingles, or missing granules.
- Annually (before summer): Clean gutters (if fitted) and remove leaves/debris from the roof using a soft broom or leaf blower.
- Every 2–3 years: Check and re-apply timber stain or paint on posts, beams, and fascia.
- After storms: Inspect for any damage from hail or high winds.
Pro Tip: Asphalt shingles tend to clean themselves during rain; however, giving them a light rinse with a hose annually helps maintain their appearance. The roofing team at How to Build a Gazebo warns against using a pressure washer on shingle roofs, as it can dislodge granules, leading to damage and reducing the roof’s lifespan.
6.2 Expected Lifespan
- Asphalt shingles: 25–40 years (architectural/laminated last longer than 3-tab)
- Treated pine frame: 15–30+ years with proper sealing
- Plywood deck: 20–30 years
- Whole structure: 25–35 years with normal care
Ready to Build Your Gazebo?
You now have everything you need to successfully build a beautiful, durable backyard gazebo with a professional asphalt shingle roof.
This is a highly rewarding project that will add value and enjoyment to your home for decades.
“By following this guide, you now know exactly how to build a gazebo that will last for decades.”
Next Steps:
- Download our free Gazebo Planning Checklist & Shopping List (link to be added)
- Measure your space and choose your size
- Get your custom asphalt shingle kit quote from us
We supply high-quality asphalt shingle roofing kits Australia-wide — designed specifically for DIY gazebo and pergola builds. This is how to build a gazebo from start to finish.
Ready to Build Your Gazebo?
You now have everything you need. Let’s get you started with a custom asphalt shingle kit.
📞 Call Us Now: 0413 742 745or
✉️ Send Us Your Gazebo Dimensions for a Fast QuoteAustralia-wide delivery • Expert advice available